Friday, April 22, 2011

Natural Egg Dyes

We did it! Finally this year I got my act together and dyed our eggs with natural egg dyes.  I really do not know why I didn't do this before, it really was not hard at all!  I shared this experience with some friends and the kids loved to smash/eat the blueberries, blend the beets and mix the turmeric. I did not boil the eggs, we colored them first then blew them out and hung them on a forsythia branch tree the kids make for the table.
I didn't get very many good picture, guess we were so busy having fun!

Here the kids are smashing blueberries.  You can see from James' face he ate more than he smashed!

from left to right...red beets, blue blueberries, and yellow tumeric. Extra bowls for mixing colors.


Ta-Da! They are so pretty!, I decided to not strain the food out of the dye to give them a textured look.
This is a link to the Mother Earth News article I got my directions from.

What do the plastic recycling numbers mean?

Happy Earth Day!
 I thought I would share a website I found that explains what the numbers mean on the bottom of the plastic containers.  It explains which numbers are easily recyclable and which are harmful if used with food! I copied and pasted this to a word document and printed it out.  I keep it on my fridge to remind me which is which when I am recycling!
-Kerry

Saturday, April 16, 2011

Peanut Butter Dog Treats

Our dog turned 4 in March.  We make a big deal about birthdays in our house (even the dogs!)
Personally I prefer to put my time,energy and love into celebrating the birth of a loved one over a commercialized holiday.
So to celebrate our pups big day we made her homemade dog treats! This is something I have wanted to do anyway...I want to stop buying commercially made treats for her.  This was our trial run at it, and it was so EASY and so much FUN we will be making all her treats for now on. Don't forget the added lessons in cooking, measuring, reading directions, taking turns and using your hands to make something for someone else!
The boys love to cook with me and really enjoyed making them and tasting them too! They are just like really cookies minus the sweetness!


She LOVED them!
Recipe:
Peanut Butter Dog Treats
2C Whole wheat Flour
1Tb baking powder
1/2 C peanut butter
1C milk
1/2 C oatmeal
(I ground mine in a coffee grinder, but it did not say to do this)
Preheat oven 375- grease pan
mix: flour,baking powder, & oatmeal
add, peanut butter & milk
roll out on floured surface, cut with cookie cutters or pizza wheel
bake for 20 mins

More Landforms...

Here are some more landforms Mason made...
here he is making the bay.
I warmed the clay in the toaster oven to soften it and make it easier to work with.

James working with them, adding animals on land and in water.

Cape

The Bay and the Cape are the 2 new ones he made this week.

Geography Landforms

We finally made it to landforms!
I feel like I have been waiting all year to make these with Mason!

We used green modeling clay...I waited for the 40% coupon for Micheal's craft store to buy one a month.
I let Mason make them, good thing too, cause his hands were stained green for days!

I bought 8x5 in foil roll pans in packs of 3.  This gave us an extra one for James to use! He loved working with the clay and made an island too! Mason filled the pitcher with water and added the food coloring

Lake

James island

Mason's island

Added animals


Mason colored in the 3 part cards. 

Thursday, April 14, 2011

School Days in April, 2011

Sound eggs
I filled the eggs with different things to make different sound like

beans, popcorn, toothpicks, pasta, rice, marble, and; pebbles. I used packing tape around them!

There is a matching set for each sound. Both boys enjoy this!

I was surprised at his concentration level and determination to find the matches, It took him awhile but he did it!
Pouring Rice with a funnel
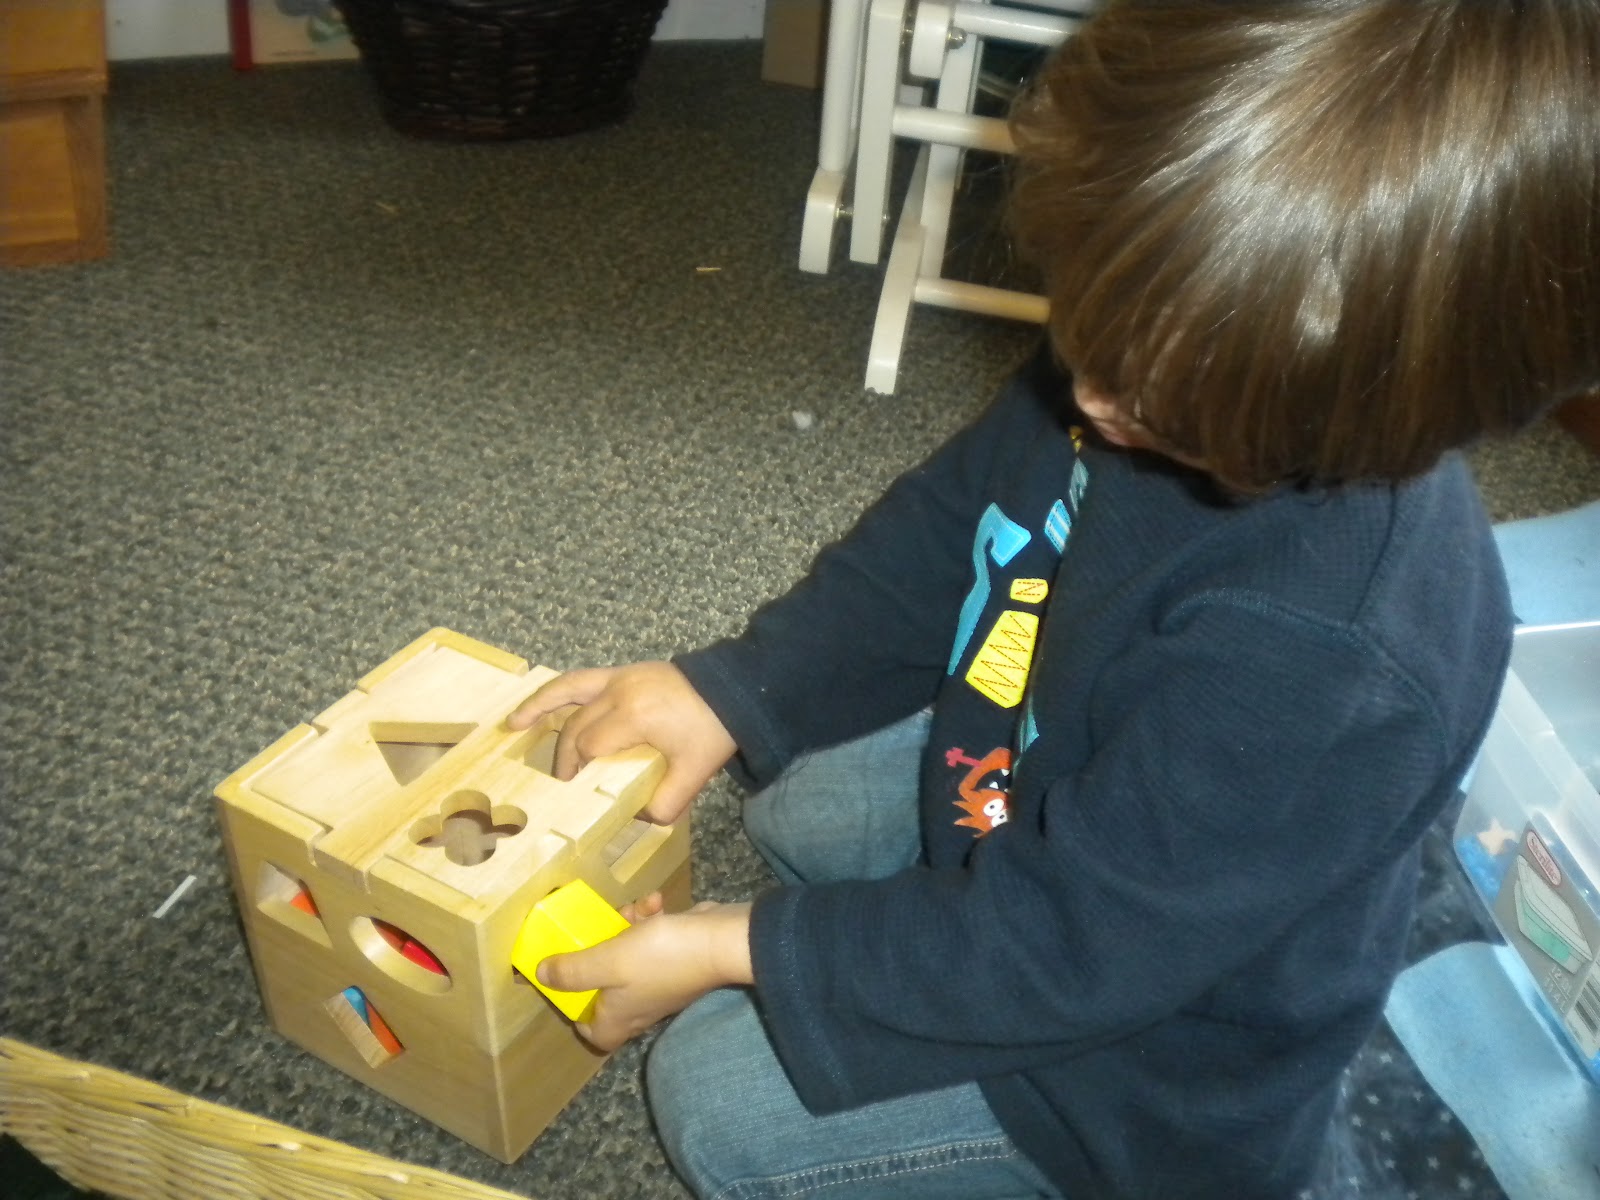
Shape sorting
I traced the shapes in his shape sorting box onto a piece of paper in the corresponding colors and laminated it.


Tracing Continents
I do not have the Montessori wooden puzzles, so I have to make do...
I took tissue paper and traced the continents shapes off the globe. Then I cut them out (very carefully). I traced them onto the corresponding Montessori colors of construction paper.  Mason cut them out for me, he was very careful and took his time, because he was doing "Mama's" work! I laminated them and cut those out (sounds like a lot of work, but it didn't really take long). Now they are in a basket, and Mason decided to make a map with them.  He taped paper together and traced the continents onto the paper about where they should go on a map.

Our new study on the continents has led to lots of questions from Mason..
"Which ocean is the biggest?
"Why is Alaska next to Hawaii on the map?"
"Which continent is the north pole on?"
"Is Australia an island?" (we are also doing landforms)
"Which continent is the largest/smallest?"

James LOVES to cut!

We moved on from 7 continent studies to North America (Mason's choice)
On the shelf is a continent box of N. America with LOTS of great things to explore inside.  I will take a pic of it and put it in the next post.


For some math, Mason worked on the Dot Board
This material is used in transition from the (concrete) bead material to the (abstract) paper and pencil.
I will try to explain the concept.

 Mason was given the number
2568,
 he made  8 dots in the units (ones) collum, 6 in the 10's, 5 in the 100's and 2 in the 1,000's with the correct colored pencil to match the collum.
then he was given

2568 (again for fun),
 this time he adds dots to the lines he already started, so from the last green dot in the (ones) collum he starts to add 8 more dots, then 6 more in the 10's, 5 more to the 100's and 2 more to the 1,000's.

Next he crosses off any lines that are filled with ten and carries another "dot" to the next collum to represent the ten he just crossed off. (are you confused? I had to do it myself to understand it)
in the end he ended up having:
6 (green dots) in the 1's, 3 (blue dots) in the 10's, 1 (red) dot in the 100's and 5 (green) dots in the 1,000's
to get the answer 2568 +2568 = 5136
He really enjoyed this work and did it several times!

Tuesday, April 5, 2011

Article on : 7 sins of a forced education

I love to share what we do in our home school on my blog, but I will be the first to admit that I am not a writer! I love when I come across an article that expresses my own thoughts on education that I can share with you!  This is one of  those articles that everyone thinks about and deep down knows its has some truth to is, but no one talks about...whats that called?....the white elephant in the room?

Saturday, April 2, 2011

"Green" easter baskets!

This is my new favorite Easter tradition!!! Last year Mason's teacher at the Audubon Society made these with the class and it was wonderful!  We are going to do this every year!
Instead of fake plastic grass (that is so very bad for Mother Earth) grow REAL grass in your Easter basket!
It takes a bit of planning on the timing, but it is so worth it!
We have made this a first day of spring tradition too!
I took the boys Easter basket out (which was a project in its self, note to self keep baskets closer to attic entrance for next year!)
I lined them with a trash bag, and tied it tight around.
We took them out on the spring Equinox and they filled the basket with dirt.
Next at the picnic table they sprinkled LOTS of grass seed on top of the dirt.
We use a spray bottle to water the seed EVERYDAY! Do not let it dry out, and place them in a sunny spot.  We used the floor in front of the glass sliding door.
Then GROW!


After 5 days the grass is growing! It is amazing to literally watch grass grow! Once it starts it grows pretty quick and the boys love to check their baskets everyday to see how fast it is growing.
Once the grass is long it started to hang over the edge of the basket and makes a beautiful "nest" for the Easter bunny to leave his surprises!